As a former Pre-Kindergarten teacher and now stay-at-home mommy of 2 boys and a sweet baby girl, many people ask me how they can be implementing educational concepts in the lives of their young children at home before they enter school. Instead of trying to come up with a quick list of ideas off the top of my head to answer these questions, I have decided to put all of my lessons into this blog. I, along with so many other parents, want to be purposeful at home with my children and make the most of the time I have with them.
I hope that this blog can help, encourage, and inspire you to work with your kiddos and
get involved in the learning process! The benefits will be endless,
and the moments you share together will be priceless! As Dr. Seuss once said,
"The more that you read, the more things you will know.
The more that you learn, the more places you'll go!"

Monday, November 14, 2011

Thinking Theme: Thanksgiving

Letter Sound of the Week:  "Th"

Number of the Week:  # of people you are celebrating Thanksgiving with - we have 8

Bible Verse of the Week:  "Enter His gates with thanksgiving and His courts with praise; give thanks to Him and praise His Name." Psalm 100:4

Books:


Songs:
Great songs here at Preschool Education!
________________________________
Lesson 1: Thanksgiving Tree (from Pinterest)
Objectives:
* To understand what being thankful means
* To recognize the many blessings in our lives and why we are thankful for them
* To create a visual representation of our gratefulness for these blessings

Materials:
* construction paper
* circle punch if you have one
* hole punch
* pen/pencil
* tree to hang the circles on


Procedure:
1. Cut out lots of circles and punch a hole in the top of each one.  You will need one circle for each family member for every day in November.

2. Each day write things you are thankful for.  Talk about the blessings in your life and explain that we should give thanks to our Lord and Savior for the amazing things we have in our lives.


3. Each day hang the "thankful for" circles on a tree ( I just have a vase of branches that we used. You could also string them together and make a thanksgiving chain.)


4. Do this every day in November!


Lesson 2: Letters/Vocabulary of Thanksgiving (from 2 Teaching Mommies)
Objectives:
* To learn the story of the first Thanksgiving
* To use letters to represent specific Thanksgiving terms
* To recognize the sounds of each letter used
* To use the fine motor skills involved with drawing and cutting

Materials:
* printables from 2 Teaching Mommies
* crayons/markers
* scissors
* if you want to make a book: hole punch, construction paper, and ribbon


Procedure:
1. Print out the story pictures and have your child color each one.  Talk about the vocabulary words, emphasizing the beginning sounds and letters they start with. (*Note: I changed the "T" to "Th" since we are learning that specific sound.)


2. Place the cards in this order and tell your child the story of the first Thanksgiving, focusing on these terms.


3.  You can put the cards together with some construction paper and ribbon to make a Thanksgiving book if you'd like!


Lesson 3: Turkey Craft ( I combined this craft from Preschool Corner and this craft from Confessions of a Homeschooler.)
Objectives:
* To understand what a turkey is and the characteristics of this animal
* To spell the words "Thanks"
* To match same colors
* To create a turkey craft using the fine motor skills involved with cutting and gluing

Materials:
* multiple colors of construction paper
* foam letters if you have them
* empty toilet paper or paper towel roll if you have one
* scissors
* glue/tape
* googly eyes


Procedure:
1. Cut a circle out of brown construction paper.  This will be the face of the turkey.


2. Get a toilet paper or paper towel roll if you have one.  We didn't, so we rolled a piece of brown paper together and taped it.  Glue or tape the circle to the top of the roll, and set it aside.


3. Cut out 6 feather shapes using 6 different colors of  paper.  Have your child cut slits in each one to make it look more like feathers.


4. Using the same 6 colors, gather the letters that spell the word "Thanks", one color for each letter.  Have your child match the letter to the correct color feather. If you don't have foam letters, you can match the same color marker to the feathers and have your child write them on the paper.


5. Help your child place the feathers in the right order and glue/tape them to the roll.


6. Cut out a small yellow triangle for the beak and a small red rectangle for the waddle.  Glue these to the face of the turkey, along with 2 googly eyes.


* There are so many turkey crafts out there, but I thought this one was pretty cute!


Lesson 4: Thanksgiving Story and Bracelet (from Dr. Jean)
Objectives:
* To review the first Thanksgiving story
* To correlate colors with specific parts of the story in order to recall what happened
* To use the fine motor skills involved with threading beads

Materials:
* poem from Dr. Jean
* pipe cleaner
* white, blue, green, black, brown, red, yellow, and orange beads


Procedure:
1. Print out the Thanksgiving poem from Dr. Jean's website.  Read the story to your child, pausing at each color.  Allow them to place the bead on the pipe cleaner as you read about it.


2. Once you have finished reading, let your child wear it and review each color that represents the parts of the story!  Sawyer loved this, and wore his bracelet all day!


Lesson 5: Pilgrim Shape Craft (from 2 Teaching Mommies)
Objectives:
* To understand who a Pilgrim is and what a Pilgrim wore years ago
* To recognize specific shapes and use them to represent parts of the Pilgrim
* To use the fine motor skills involved with gluing and drawing

Materials:
* directions from 2 Teaching Mommies
* brown, black, white, yellow, and blue construction paper
* scissors
* glue
* markers


Procedure:
1. Before you start the lesson, pre-cut these shapes out as seen on the 2 Teaching Mommies website.


2. Call out the name of a shape, and have your child choose the correct one.  Then help them place the shapes together to make the Pilgrim.  Talk about the Pilgrims and the clothes that they wore.  You can look at different pictures online or in books for them to get a better understanding.


* Cute craft, and great shape recognition lesson!


Extra Thinking:
* Harvest File Folder Game (from File Folder Fun)


* Which is different? (from 2 Teaching Mommies)


* Setting the Table/Thanksgiving Cooking - This is a great way to get your child involved in the preparation of the big day!  Setting the table allows them to use the one-to-one corresponce concept in placing one of each item at each place on the table.  And, of course, cooking involves so many measuring and fine motor skills concepts.  Have fun preparing the feast with your kiddos!

* Thanksgiving Placemats - Let your child create a placemat to use for your Thanksgiving meal.  Here is the one Sawyer made at mother's day out:

Thursday, November 10, 2011

Thinking Theme: Pumpkins

Letter of the Week:  Pp

Number of the Week:  10

Bible Verse of the Week:  "Every good and perfect gift is from above." James 1:17

Books:


Songs:
* Great songs here from Suite 101.
_____________________________________
Lesson 1: Pumpkin Patch Field Trip
Objectives:
* To visit a pumpkin patch
* To learn what pumpkins are and their characteristics
* To recognize the differences in pumpkins (different sizes and shapes)
* To pick out/purchase a pumpkin

Materials:
* camera :)
* money to buy a pumpkin

Procedure:
1. Visit your local pumpkin patch!  Talk about pumpkins and walk around to discover how each one is different.  Have your child pick out one to use during the week's lessons.  And, of course, take lots of pictures!

Sweet Brothers


Checking out the pumpkins!


Getting so big!


Going for the big one!


Of course, Tucker wanted to eat it!


Being Silly!


Lesson 2: Pumpkin Investigation
Objectives:
* To understand the characteristics of a pumpkin
* To find out information on your specific pumpkin including measurements, number of seeds inside, etc.
* To use measuring, counting, and observation skills
* To use the fine motor skills involved with cutting and writing

Materials:
* Pumpkin Investigation Printable


* plate
* knives (one real and one plastic)
* measuring tape
* scale
* pencil or crayon


Procedure:
1. Have your child pick up the pumpkin and observe it.  Ask them to use their senses and describe it.  Fill in the blanks on the investigation worksheet.


2. Measure the pumpkin and write the number on the worksheet.  Then weigh it on the scale and write this information, as well.


3. Time to get messy! Cut a hole in the top of the pumpkin, and have your child dig in!  Let them describe the inside of the pumpkin and how it is different from the outside.  Remember to have them draw pictures of each.


4. Have your child pull out the seeds and place them on the plate.  You will probably have to help them clean out the whole pumpkin.  Your child might not be able to count all of the seeds inside since there are so many, but have them tell you if there are a lot of seeds or just a few.


5. Talk about the many things we bake with pumpkins. (pies, cookies, soups, etc.)  Then discuss how you can create jack-o-lanterns, as well.  Ask your child to choose specific shapes for the face of the jack-o-lantern that you make.  Let them make little cuts with their plastic knife.


Lesson 3: Pumpkin Growth Sequence - From Seed to Pumpkin Book
Objectives:
* To understand the sequence of the life cycle of a pumpkin and be able to put pictures of the cycle in the correct order
* To state the life cycle of a pumpkin
* To create a life cycle book using the fine motor skills involved with cutting, hole punching, and tying

Materials:
* life cycle printables from Montessori For Everyone
* 2 pumpkin printouts (I just used clipart)
* scissors
* hole punch
* ribbon or ring to hold book together
* book about pumpkin life cycle if you have one


Procedure:
1. Read or tell your child about the life cycle of a pumpkin.  Talk about the sequence of the cycle and the specific order that a pumpkin grows in. Cut out the pictures of the life cycle and have your child place them in the correct order.


2. On one of the pumpkins, write "From Seed to Pumpkin" as the title of your little book.


3. Align the pictures with the pumpkins and punch a hole in the top and tie a ribbon to create the book.


4. Review this cycle with your book throughout the week!


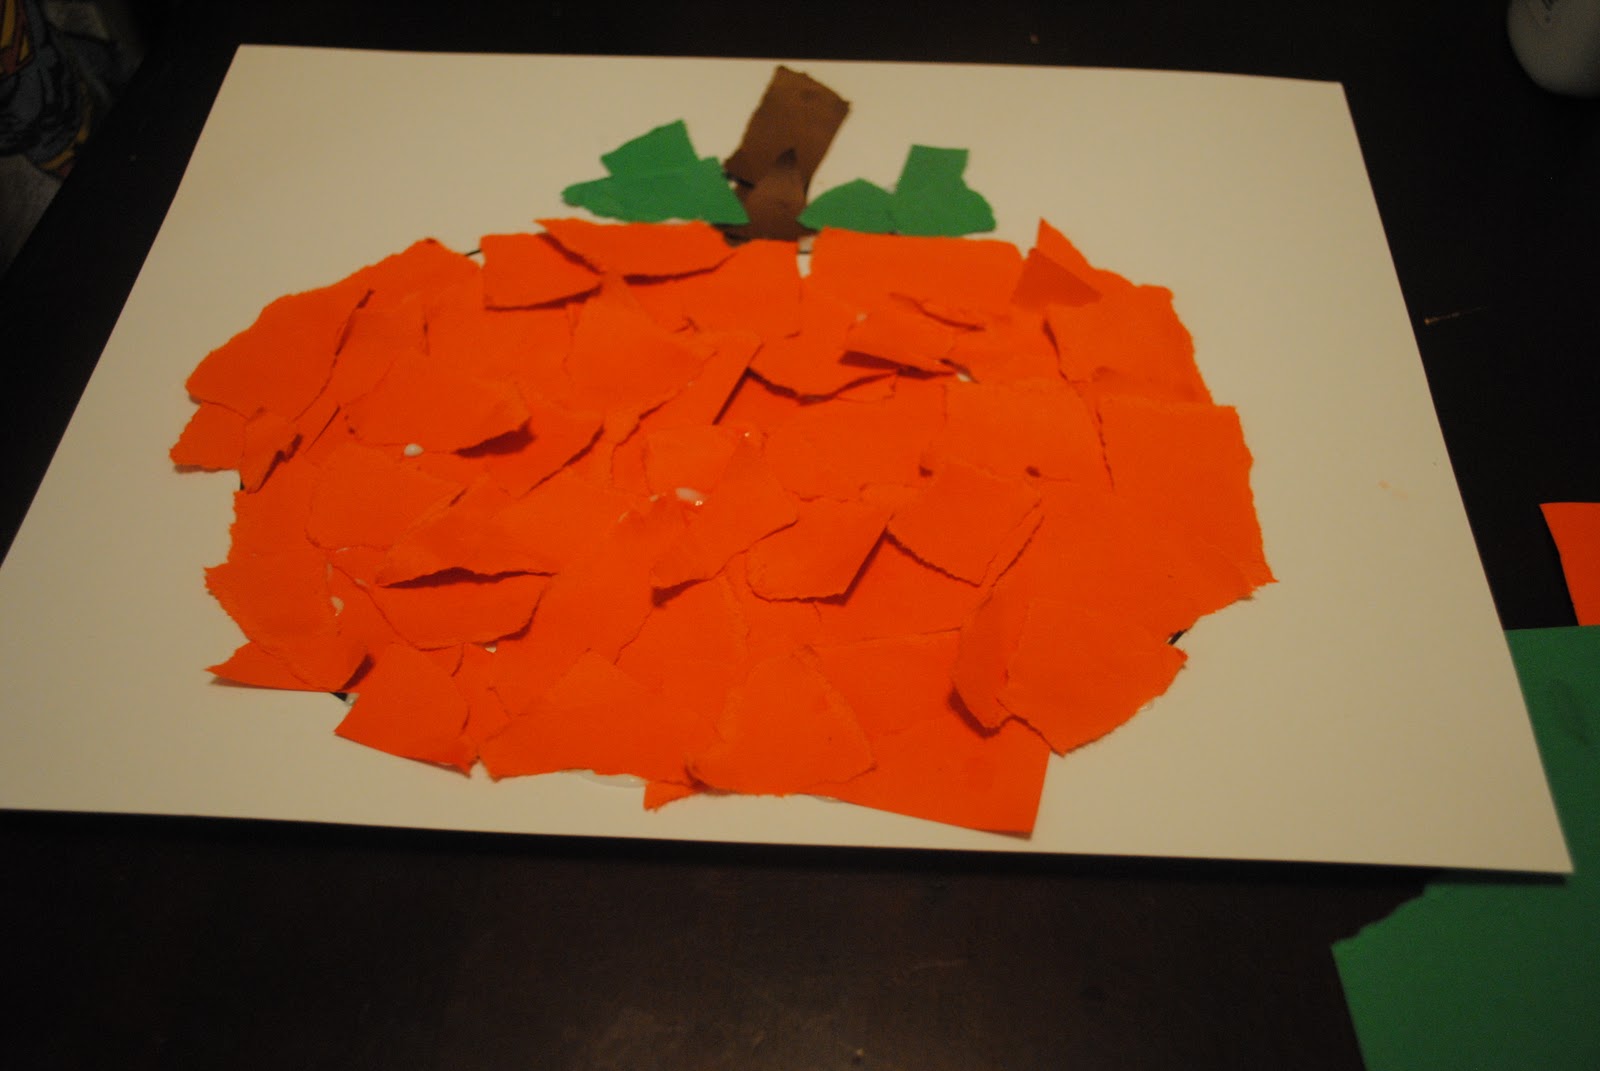
Lesson 4: Pumpkin Craft
Objectives:
* To review the characteristics of pumpkins, focusing on the outside
* To create a pumpkin craft using the fine motor skills involved with tearing and gluing

Materials:
* pumpkin printable (you can use any pumpkin printout you want to)
* orange, green, and brown construction paper
* glue


Procedure:
1. Tear the orange construction paper into small pieces and glue them on the pumpkin shape.  This is a great activity to build up the tiny muscles in your child's hands and fingers.


2. Tear a few small pieces of brown construction paper and glue them on the stem of the pumpkin.  Discuss how the stem connects the pumpkin to the vine that it grows on.


3. Tear some green pieces of paper and glue them around the stem for leaves.


Lesson 5: Pumpkin Cooking
Objectives:
1. To recognize that pumpkin can be cooked in many different ways and in many different dishes
* To cook whatever you'd like with pumpkin
* To use measurement and cooking skills
* To follow a recipe and understand the order of steps in cooking
* To use the motor skills involved with pouring, stirring, etc.

Materials:
(This lesson is up to you!  There are so many recipes out there with pumpkin, and I'm sure you have your favorites!  Cook whatever your craving!)
* whatever your recipe calls for

Procedure:
* Follow your recipe!  Here are a few that I like:
1. Pumpkin Cheesecake
2. Pumpkin Cookies
3. Pumpkin Gingerbread

Extra Thinking
* Letter Pp - cute crafts here from Totally Tots

* Pumpkin Lessons from 2 Teaching Mommies

* Compare pumpkins and apples in order to review their characteristics and learn their similarities and differences.  You can use a venn diagram for this.