
Number of the Week: 8
Bible Verse of the Week: "Oh, give thanks to the Lord, for He is good." Psalm 118:1
Books:


Songs:
I found lots of fun ocean songs here at Everything Preschool.
_____________________________________
* This is a 2 week unit, so there are 10 lessons listed with lots of extras to choose from! Enjoy!
Lesson 1: Ocean in a Bag
Objectives:
* To understand that the ocean is made up of different components including sand, salt water, and ocean animals
* To taste the difference between salt water and fresh water
* To recognize that certain animals have to live in salt water in order to survive
* To recognize specific ocean animals and say their names
Materials:
* 3-4 cups of water
* clear measuring cup or glass
* blue food coloring
* gallon size ziploc bag
* 2-3 tablespoons of salt
* 1 cup of sand
* ocean animal toys (you can also use ocean fruit snacks if you don't have toys)
Procedure:
1. Put 3-4 cups of water into a clear measuring cup or glass. Add 2-3 tablespoons of salt to the water and mix together.

2. Have your child taste the water and ask them what it tastes like. Talk about the difference between salt water and fresh water, and explain that the ocean is made of salt water.

3. Then let your child add 2-3 drops of blue food coloring to the water to make it look like the ocean.


4. Set the water aside for a minute. Add about a cup of sand to a gallon size ziploc bag.

5. Then add the blue water to the bag, as well as the ocean animals. Talk about the names of each animal and explain that they have to live in salt water instead of fresh water in order to survive.


6. Ocean in a Bag! Keep your bag for the next 2 weeks and review the components of the ocean throughout your lessons! (Note - I put the bag into a large plastic container to store it just in case of spills!)

Lesson 2: Rainbow Fish
Objectives:
* To be able to comprehend the story of Rainbow Fish by answering questions related to the book
* To understand the importance of sharing and being a good friend
* To use the fine motor skills involved with folding tissue paper and gluing
Materials:
* The book Rainbow Fish or access to You Tube on the Internet
* blue construction paper
* printout of a fish or you can just draw your own
* different colors of tissue paper
* glitter or foil
* glue

Procedure:
1. Read the book, The Rainbow Fish, or watch the video online at www.youtube.com under Rainbow Fish Story Video.


2. Talk about what happened in the story, how the rainbow fish was beautiful but had no friends because he was not willing to share, and how he learned what it meant to be a true friend. Ask your child why it is important to share with others and be a kind, loving friend to everyone.
3. Print out a fish shape pattern and glue it to a piece of blue construction paper. You can also draw the fish directly onto the paper.

4. Cut up multiple colors of tissue paper into small squares.

5. Show your child how to pinch the tissue paper together and glue it onto the fish. These will represent the rainbow fish's scales. Allow the child to do the rest.

6. After most of the fish is covered, choose one place on the fish and put some glue there and sprinkle glitter onto the spot. After about 2 minutes, shake off the extra glitter. You can also use a small piece of tin foil. This will represent the one shiny scale left on the rainbow fish and act as a reminder to your child that we need to share and give to others!

Lesson 3: Pass the Pail
Objectives:
* To recognize that letters have specific sounds
* To match letters to objects that start with the sound of the letter
* To be able to say other words that start with that same sound
Materials:
* Ocean animal toys or pictures of ocean animals
* letters (can be magnetic letters, letters from an alphabet puzzle, or you can just write them on construction paper and cut them out)
* a bucket or pail

Procedure:
1. Gather different ocean animals or pictures of ocean animals, as well as the letters that they start with. (ex: Crab - C, Dolphin - D, Starfish - S, etc.)
2. Place all of the ocean animals into a bucket or pail representing a pail you would play with at the beach. Spread out the letters on a table so that your child can see each one.
3. Have your child reach into the pail and choose one animal. Then ask them to find the letter that it starts with. It is important to annunciate the sound for them so they get used to it. (ex: fish - /f/, /f/, fish, what letter makes the /f/, /f/ sound?


4. Help your child find all of the matches and place the animals next to the corresponding letters. Ask them to review the letter sounds and say them back to you.

Extension:
* Have your child say other words that start with the same sounds (ex: Say "C is for crab, what else starts with a /c/, /c/ sound?" - cat, car, etc.)
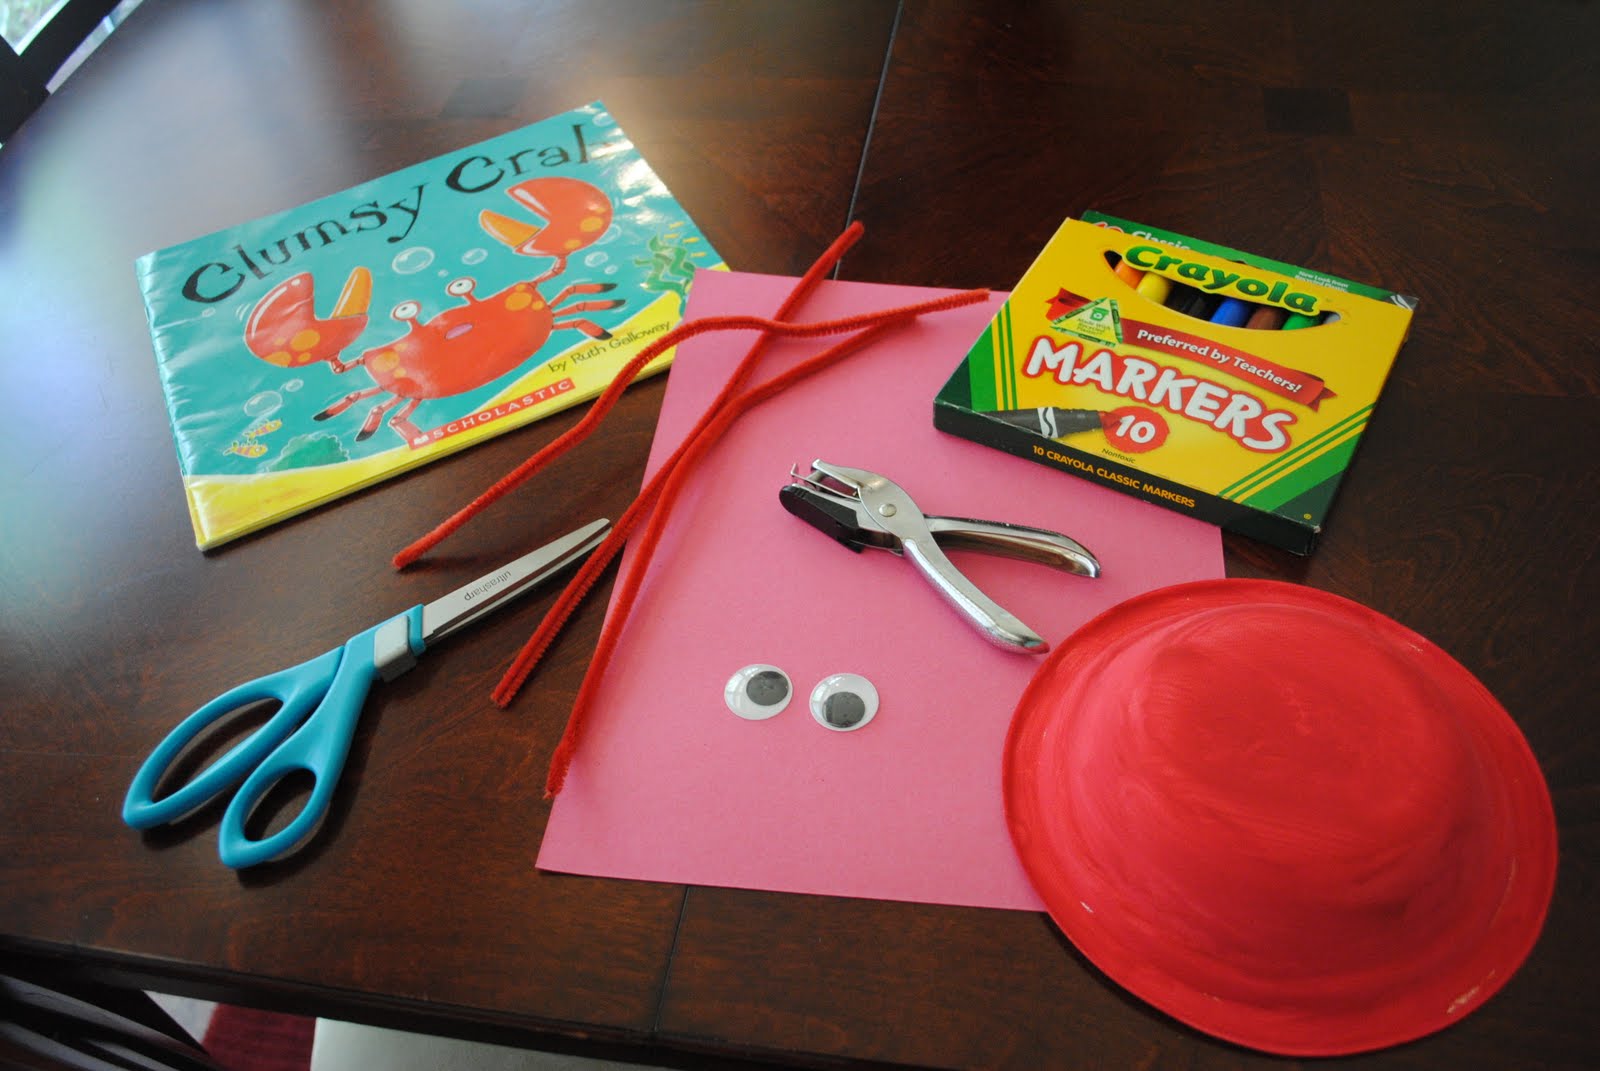
Lesson 4: Clumsy Crab
Objectives:
* To understand what a crab is and it's characteristics
* To recognize that crabs live in the ocean
* To use the fine motor skills involved with painting, cutting, gluing, and drawing
Materials:
Part 1:
* book about a crab
* paper plate or paper bowl
* red paint
* sponge
* drop cloth
* something for child to cover their clothes

Part 2:
* 4 pipe cleaners
* red construction paper
* scissors
* marker
* tape or glue
* 2 googly eyes
* hole punch
Procedure:
1. Read a book about a crab to your child. We read The Clumsy Crab by Ruth Galloway. Talk about the characteristics of the crab, as well as what happened in the story.
2. Place a paint smock or coverup over your child's clothes to protect them from paint! :) Also put a drop cloth down on the ground in the area you will be painting in.

3. Put a little bit of red paint into a bowl and have your child dip a sponge into it and paint the outside of a paper plate or paper bowl. Set it aside to dry for about an hour.

4. When you have time to come back to the project, draw 2 claw shapes onto red construction paper and help your child cut them out, and set them aside.

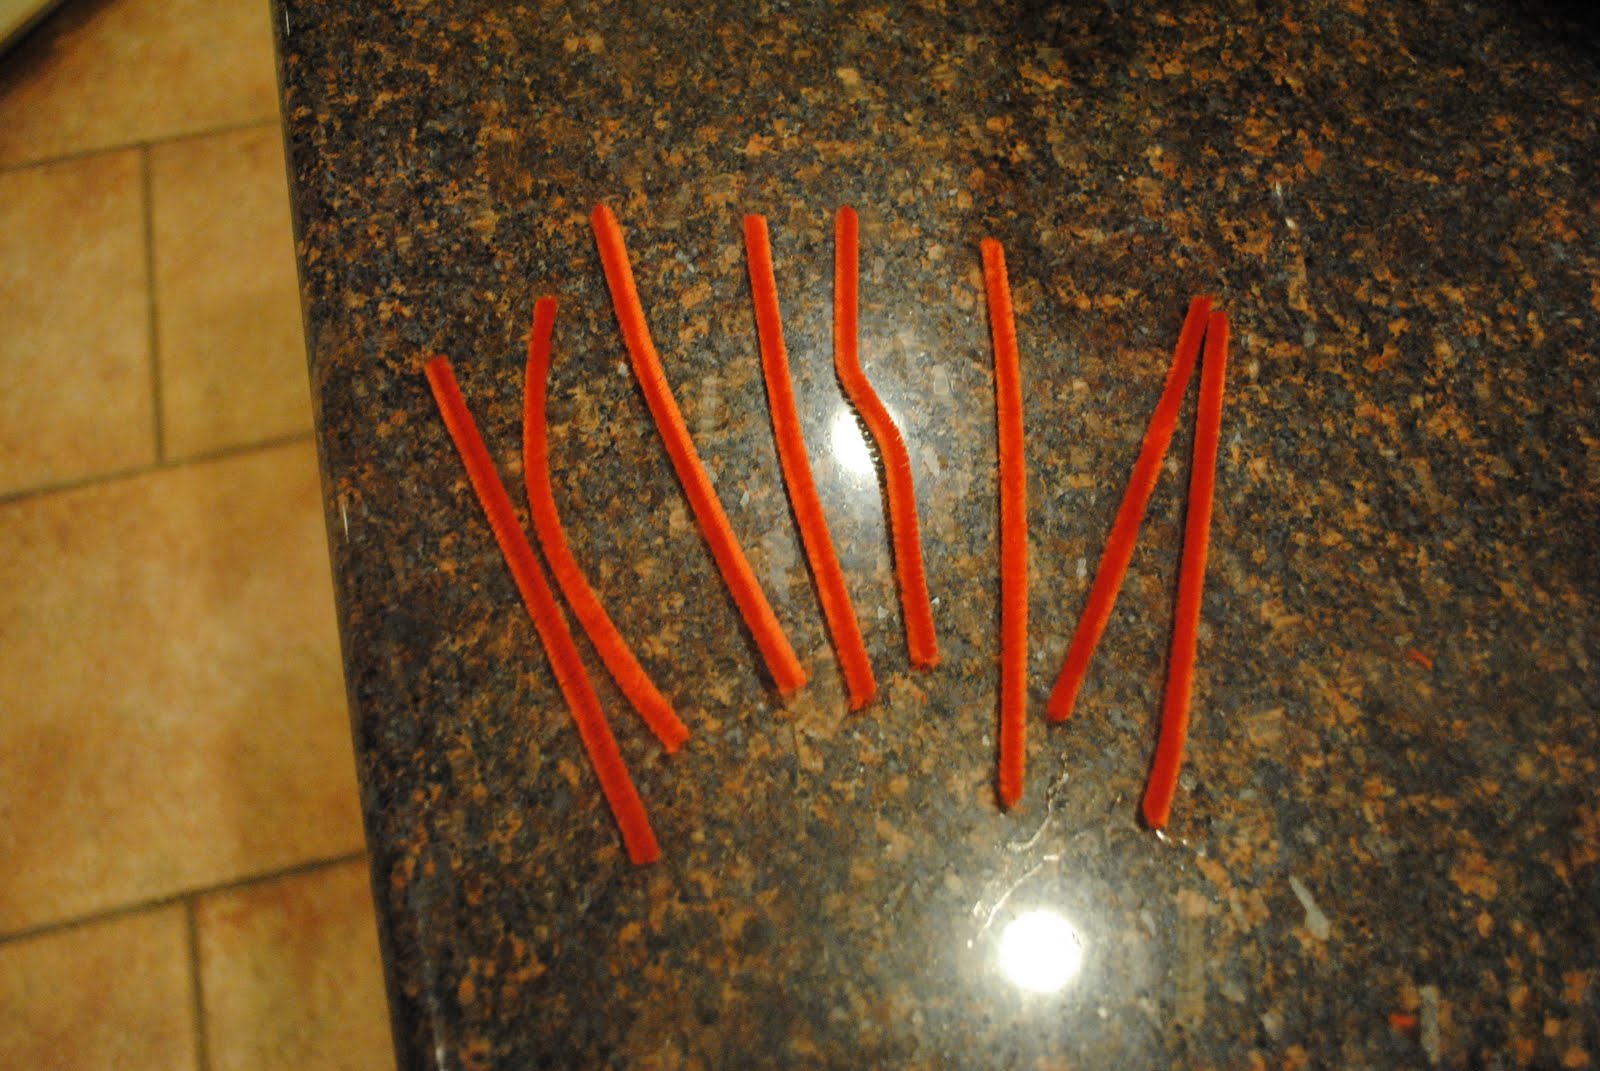
5. Cut the 4 red pipe cleaners in half in order to make 8 smaller pieces. These will be the legs of the crab. This is also a good time to practice counting to 8 (number of the week) with your child. Have them count each pipe cleaner piece.
6. Punch 4 holes on each side of the red plate or bowl. Put a pipe cleaner through each hole and twist them around so they stay in place. Then glue or tape the claws onto the top of the bowl. Add the googly eyes and draw a smily face! :)


7. Now you have a sweet little crab! Have your child act out the story from the crab book you read using their little craft!
Here is another crab you can make from Daily Dose of Sugar Mama!
Lesson 5: Ocean Patterns
Objectives:
* To understand what a pattern is and the differences between types of patterns
* To create patterns using 3 items (AB patterns, ABC patterns, AABB patterns, etc.)
Materials:
* clip art or drawn ocean animals (3 animals, 4-6 each)
* scissors

Procedure:
1. Print out or draw 3 different types of ocean animals. You need to have 4-6 copies of each animal. Cut each one out and have your child place the animals into 3 groups. This is a great, quick sorting lesson within a pattern lesson.

2. Show your child a simple pattern. (ex: seahorse, jellyfish, seahorse, jellyfish, etc.) Have your child continue to pattern by adding the next pictures. Explain that a pattern repeats the same thing over and over again. Demostrate how to look at each picture to figure out what is supposed to come next.

3. Once they sort of understand the concept, you can add another animal to make an ABCABC pattern. Have the child continue to practice and make new patterns with the animals. This is a difficult concept to grasp just from doing one lesson. We will be doing lots of patterning activities in the future so they can fully comprehend! :)

Lesson 6: Octopus
* I got this idea here at Crafty Crafted, but I changed it just a little.
Objectives:
* To understand what an octopus is and it's characteristics
* To recognize that an octopus lives in the ocean
* To create an octopus, focusing on it's 8 tentacles
* To count to 8 and match the numbers 1-8 with the correct amount of stickers
* To use the fine motor skills involved with cutting, gluing/taping, coloring, and placing stickers
Materials:
* construction paper
* small stickers
* scissors
* tape or glue
* markers
* yarn
* 2 googly eyes
* hole punch

Procedure:
1. Roll one piece of construction paper into a tube shape and tape/glue it in place.

2. On another piece of construction paper, draw lines for your child to cut out 8 strips for the 8 tentacles. One idea that I used in my classroom is to use a green crayon or marker to draw the lines. Tell your child that green means go, and they can go with their scissors on each line.


3. Write numbers 1-8 on the tentacles. Guide your child's hand or have them write themselves.

4. Then have your child place the corresponding number of stickers on each one.


5. Tape/glue each tentacle to the tube construction paper piece.

6. Add googly eyes and a face to the tube.

7. If you would like, you can punch holes on the top sides of the Octopus and thread a piece of yarn or string through to hang it up.

Lesson 7: Sea Shell Sorting
Objectives:
* To understand what sea shells are and how they are different
* To sort shells into groups according to similarities (ex: same shape, same size, same color)
Materials:
* bag of sea shells (I found some at Hobby Lobby for $2.50)
* pan with edges to hold the shells
* divided platter or plate to sort or you can just make small groups on the table
* magnifying glass if you have one

Procedure:
1. Place all of the sea shells in a pan and have your child observe each one by looking at them with a magnifying glass and touching them to feel their textures and shapes. Talk about how sea shells are found on the beach in the sand or on the bottom of the ocean. Remember that some shells are "homes" for special ocean creatures like small crabs.

2. Ask your child to put the shells into groups according to the same shape. If you need to, show them an example by creating the first group.
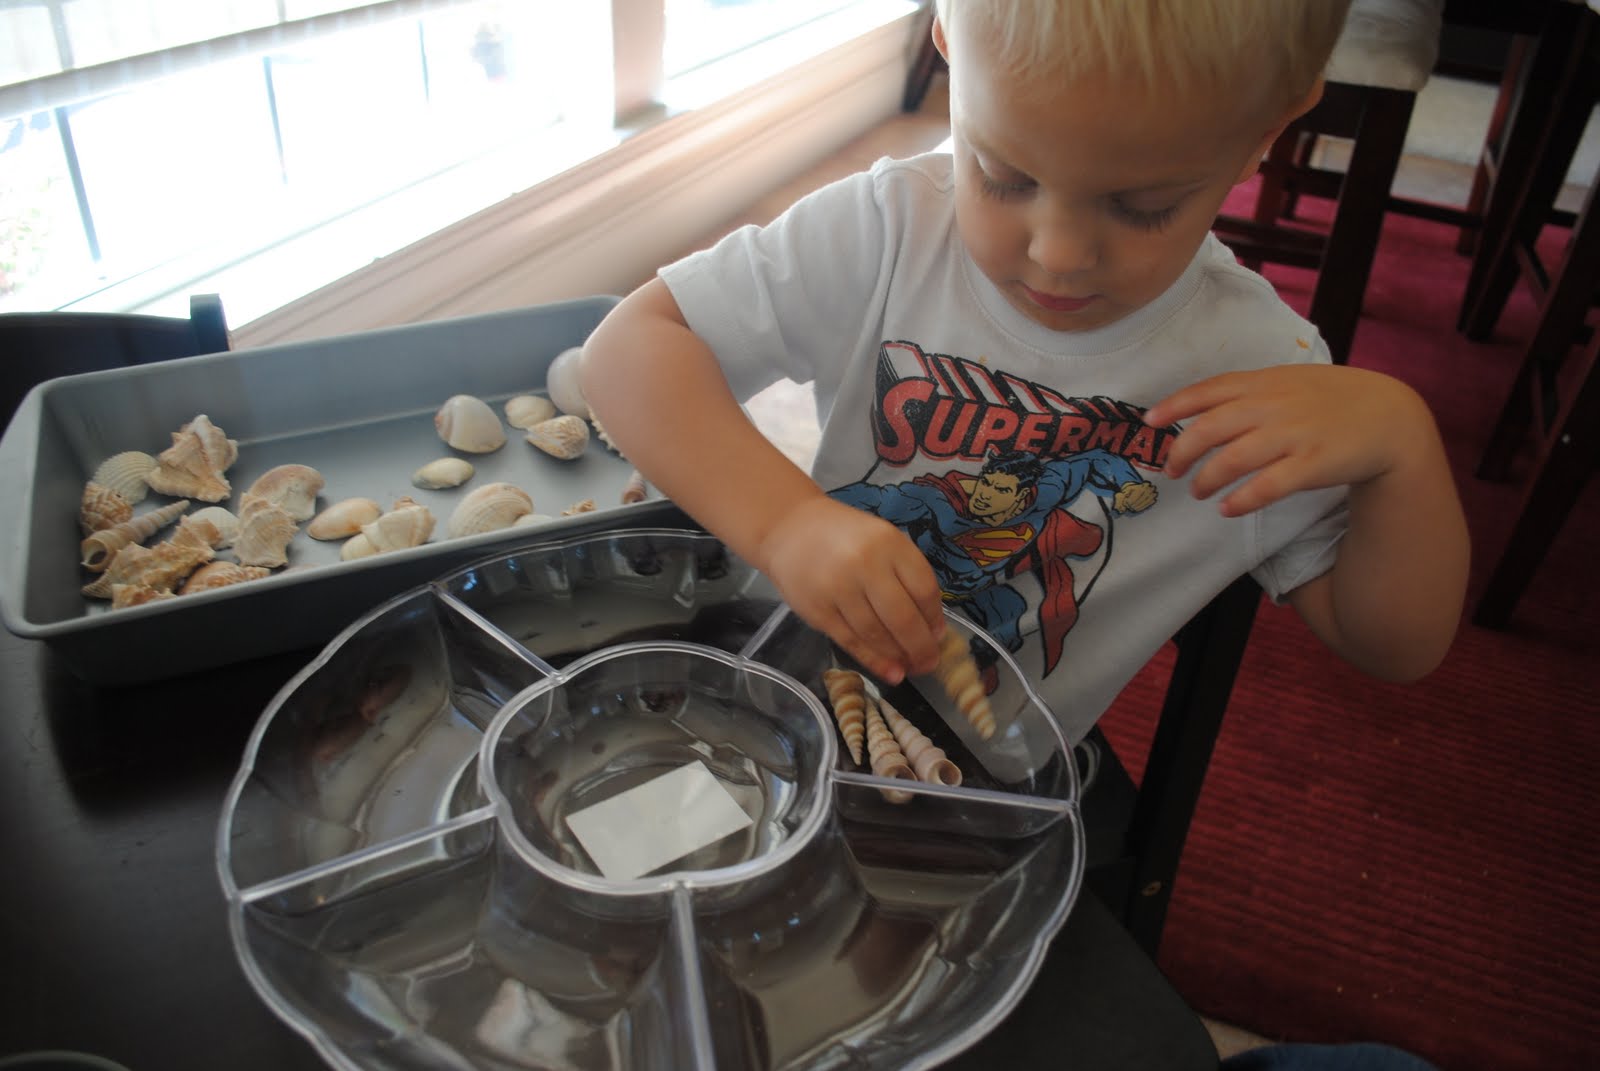

3. Once they are finished sorting by shape, then ask them to sort by size and then by color.

5. Extensions:
* Use playdough to make sea shell prints by pressing the shells into the playdough
* Make sea shell patterns and review lesson #5
Lesson 8: Beach Ball Letter Match
Objectives:
* To understand that each letter has an uppercase image and a lowercase image
* To match upper and lowercase letters together
* To use motor skills involved with catching and throwing
Materials:
* beach ball
* permanent marker

Procedure:
1. Write uppercase and lowercase letters on the beach ball, making sure the same letters are not close together on the ball. (Do not use the letters Cc, Kk, Mm, Oo, Pp, Ss, Uu, Vv, Ww, Xx, Yy, and Zz. These letters look the same in both upper and lowercase.)

2. Play a game of catch with your child. First, you find a letter (ex: uppercase A) then throw the ball to them and ask them to find the match. (ex: lowercase a)


3. Continue playing until you have made all the matches. Make sure you start with uppercase sometimes and lowercase sometimes so that your child is not always finding just the lowercase letters.
Lesson 9: Goldfish Graphing
* I found this activity here at Oopsey Daisy. The graph is free to download.
Objectives:
* To understand what a graph is and how to create one
* To sort goldfish according to color
* To graph the number of goldfish based on color
* To count each color of goldfish and determine which has the most, least, etc.
* To use the fine motor skills involved with sorting, coloring, and writing
Materials:
* colored goldfish
* graph from Oopsey Daisy
* crayons or markers

Procedure:
1. Place one goldfish of each color in the first column of the graph to show your child how to start. Explain that they are to put all of the colored fish in the correct line of the graph.

2. Allow the child to place the fish in the coordinating rows. (*Hint - there are only 7 spaces for each color, make sure you only have the child use a certain number for each color, ex: 3 yellow, 5 purple, 7 orange, 4 green)


3. Once the graph is finished, count how many fish were in each line and have your child color in the coordinating number of squares for each color. Talk about which color had the most fish, which color had the smallest number of fish. Guide your child's hand as they write the number next to each line in the graph.

5. Extensions:
* Use an egg carton and write numbers in each hole. Have the child place the correct number of goldfish in each one.
Lesson 10: Ocean Snacks
Objectives:
* To review the characteristics of the ocean
* To create an ocean in a bottle that you can drink :)
Materials:
* bottle of water
* fruit snacks in the shape of ocean animals (we used Finding Nemo)
* Blue Hawaiian Punch Singles-to-go powder

Procedure:
1. Pour one package of the Hawaiian Punch into a bottle of water.

2. Shake it up until fully mixed.

3. Add Ocean fruit snacks to the bottle. As your child puts each one in, have them say the name of the animal.


4. Drink the ocean in a bottle. The kids will have a lot of fun trying to get to the fruit snacks! This is a great time to review everything your child has learned throughout the last 2 weeks!

Extra Thinking:
* Letter Oo - glue cheeri"O"s on the letter O (remember to do upper and lowercase)


* Visit an aquarium or the beach! We went to the Denver Aquarium this summer and got to see lots of cool creatures! Check it out!


* Tons of Ocean Activities here at The Virtual Vine!
* Shark Letter Game - Love this from I Heart Crafty Things!
* Lobster Craft from Crafty Crafted
* Ocean vs. Land Animals from Pre-K Pages
* Whale Craft from DTLK Kids

No comments:
Post a Comment