
Number of the Week: 13
Bible Verse of the Week: "Rejoice in the Lord always; again I will say, rejoice!" Philippians 4:4
Books:


Songs:
* Jack Hartmann - Rhyming to the Beat - definitely worth a purchase or download!
* Mother Goose Club is a fantastic website with videos of each rhyme that your children can watch and sing along to!
Rhyme Focus:
* Each day we will be focusing on a different nursery rhyme. I have posters for all of them, but there are nursery rhyme printables from PreKinders and ABC Teach that you can use throughout the week. It is important to focus on the rhyming words for each specific one. Use crayons or markers to circle each set of rhyming words in a different color. Here is an example:


____________________________
Lesson 1: Humpty Dumpty
Objectives:
* To learn and recite the Humpty Dumpty nursery rhyme
* To recognize the rhyming words in the rhyme
* To understand what happens to an egg when it breaks
* To create a picture of Humpty Dumpty using the fine motor skills of tearing, cutting, gluing, and drawing
Materials:
* white, blue, and red construction paper
* scissors
* glue
* pencil
* googly eyes and crayons if you would like

Procedure:
1. Read the Humpty Dumpty rhyme and circle the rhyming words.
2. Talk about what happens to an egg when it breaks and cracks. You could even demonstrate with a real egg. Discuss why the king's horses and king's men could not put him back together. Ask your child if they think they can put him together again...or at least try!
3. Help your child draw horizontal and vertical lines to represent a brick wall on half of the red construction paper, then cut out the half of the paper.


4. Glue the half sheet onto the bottom half of the blue construction paper.


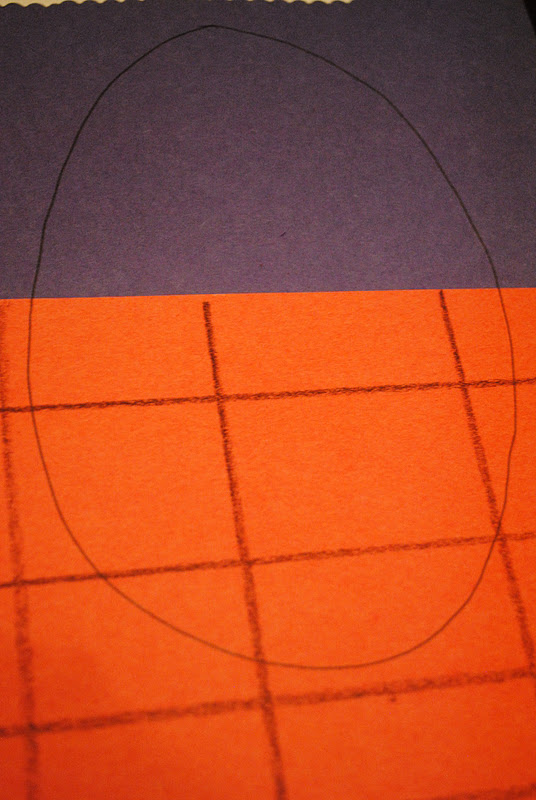
5. Draw an egg/oval shape with half of it on the blue paper and half on the red paper.
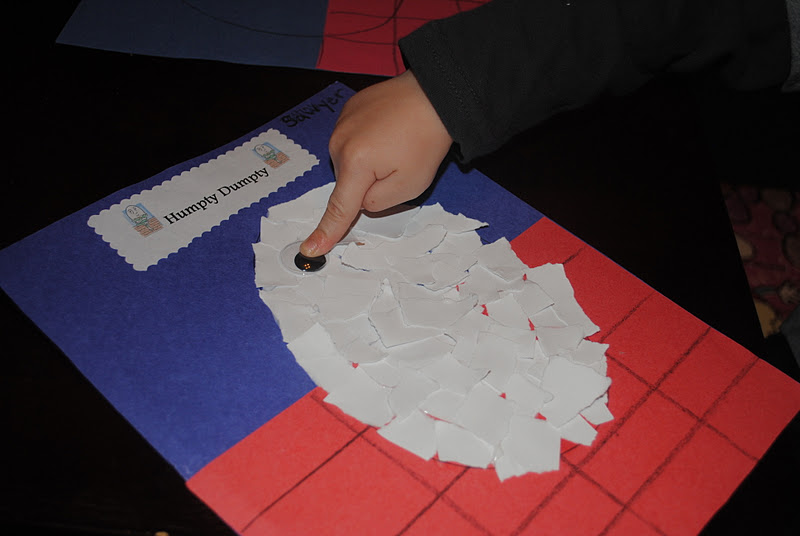
6. Have your child tear small pieces of white paper while they recite the nursery rhyme. These small pieces will represent the egg shells. Then ask them to glue the pieces onto the oval shape and put Humpty Dumpty back together again!


7. Sawyer added googly eyes, a nose, a mouth, arms, and legs to the picture. I also added a little Humpty Dumpty title!

Lesson 2: Jack Be Nimble
Objectives:
* To learn and recite the Jack Be Nimble nursery rhyme
* To recognize the rhyming words in the rhyme
* To act out the nursery rhyme
* To understand the three components needed for a fire to burn (heat, fuel, and air)
* To hypothesize about what will happen when one of these components is taken away
Materials:
* candle and candlestick/stand
* lighter
* clear jar or cup that can fit over the candle

Procedure:
1. Read the Jack Be Nimble rhyme and circle the rhyming words.
2. Place the candle on the ground (NOT lit, of course!) and have your child say and act out the nursery rhyme by jumping over the candlestick. You can even replace the name Jack with their name to make it more fun!


3. Talk about the three things a fire needs to burn - heat, fuel, and air. Explain that the heat comes from the lighter, the fuel is the wick/wax from the candle, and the air is surrounding the candle. This would also be a great time to review fire safety!
4. Light the candle and have your child blow it out. Explain that when they blow, it takes the heat away from the fire, and it goes out.

5. Now light the candle again and ask your child what they think will happen if you put a jar over the candle and take the air away. After they have guessed, place the jar over the candle and watch.


6. Explain that by covering up the candle, the air was taken away from the fire, so it went out. Have them repeat the three things a fire needs to burn - heat, fuel, and air.
Lesson 3: Hickory Dickory Dock
Objectives:
* To learn and recite the Hickory Dickory Dock nursery rhyme
* To recognize the rhyming words in the rhyme
* To create a clock and understand the specific parts - face, hands, numbers
* To learn how to tell time based on the hour
Materials:
* paper plate
* crayons or markers
* black construction paper
* scissors
* brad
* foam numbers (or you can just write them)
Procedure:
1. Read the Hickory Dickory Dock rhyme and circle the rhyming words.
2. Have your child color and decorate a paper plate however they would like.

3. Show them a picture of a clock or an actual clock. Tell them about the different parts of the clock - the face, the hands, the numbers and dashes that represent minutes and hours.

4. Using the foam numbers, have your child place 12 at the top of the plate and 6 at the bottom directly under 12. Then add 3 and 9 in the correct spots. Doing these numbers first will help with spacing of the rest.


5. Let your child check the picture of the clock to see where the rest of the numbers go, then let them place the numbers in the correct order.


6. Now cut the 2 hands of the clock out making sure that one is longer than the other.

7. Using a brad, place the hands of the clock in the center of the plate, making sure the big hand is on top of the little one.

8. Demonstrate how to tell the time (based on hours...definitely not ready for minutes yet at this age!) Show them how the big hand points to 12 and the little hand points to the hour it is. Ask them to do some, as well.


Lesson 4: Baa, Baa Black Sheep, Little Bo Peep, and Mary Had a Little Lamb
Objectives:
* To learn and recite the "sheep" nursery rhymes
* To recognize the rhyming words in the rhyme
* To learn about the process of sheep shearing and the products that are made from sheep's wool
* To create a sheep craft using the fine motor skills of cutting, gluing, and taping
Materials:
* Sheep Shearing video
* newspaper or scrap paper
* masking tape
* cotton balls
* black construction paper
* black straws or pipe cleaners
* googly eyes
* scissors
* glue
Procedure:
1. Watch the sheep shearing video and talk about the process of it. Review the different items that can be made out of wool.

2. Create a sheep craft from Crafty Crafted. I will let you follow the directions from the site. So cute!


Lesson 5: One, Two, Buckle My Shoe
Objectives:
* To learn and recite the One, Two, Buckle My Shoe nursery rhyme
* To recognize the rhyming words in the rhyme
* To display specific numbers using your fingers
* To act out the nursery rhyme
Materials:
* a few sticks (we used popsicle sticks)
Procedure:
1. Read the One, Two, Buckle My Shoe rhyme and circle the rhyming words.
2. Have your child act out each part of the rhyme, first by displaying the numbers with their fingers, then doing the action in the rhyme.
* 1, 2, Buckle My Shoe


* 3, 4, Knock On The Door


* 5, 6, Pick Up Sticks


* 7, 8, Lay Them Straight


* 9, 10, A Big Fat Hen! (Sawyer just flapped around like a chicken for this! :))


Extras:
* Row, Row, Row Your Boat - Create a boat and float it in water. Here are directions from Family Fun. We used playdough instead of modeling clay and construction paper for the sail instead of fabric.


* Little Miss Muffet and Itsy Bitsy Spider - Marble painting with black construction paper and white paint to get a spider web effect


* Little Boy Blue - Make a horn craft from Hummingbird Educational Resources. (Scroll down to the Little Boy Blue activities)
* Old Mother Hubbard - Cut out pictures of food and other items from magazines that could fill Old Mother Hubbard's cubbard, and glue them onto construction paper. You could even add brown construction paper rectangles on top to pretend they are the doors on the cubbard. (also from Hummingbird Educational Resources)

No comments:
Post a Comment